Being able to sew is a skill, that many of my age group weren’t really taught, so I taught myself!
If like me you’re learning more and more about how textile waste predominantly from fast fashion brands affects our planet, and the people making those clothes, you might be thinking about learning to sew your own clothes, or to be able to upcycle some pieces you’ve picked up secondhand, or perhaps you want to be able to repair or alter clothes already in your wardrobe.
It can be quite overwhelming, so I thought I’d share my 6 sewing essentials, to help get you on your way. Whether you’re thinking about it, or you’ve taken the dive and have a sewing machine already but haven’t quite plucked up the courage to use it yet.
1. Sewing machine

This one may be a little obvious, but unless you’re planning to hand sew you’ll need a sewing machine.
I use the Singer Professional C430 which I got on sale at the Official Singer Outlet website. It’s currently on sale for just under £500, but this is my second machine. I chose this one because of my illness and symptoms - sometimes I can’t sit on my bum but I can stand or kneel, and it’s machine has a grey “auto-sew” options, which means I can press a button instead of using the pressure foot.
A great beginner sewing machine which I learned on and is much cheaper is the Brother LK14s, sometimes they’re on sale in Argos or John Lewis for around £80. You can also pick up great beginner sewing machines secondhand, but I wold advise if you do this to take it/send it to a sewing machine repair/service person to make sure everything is working as it should.
The main things you should look out for are - making sure there is a basic straight and zig zag stitch, as you’ll likely need both of these.
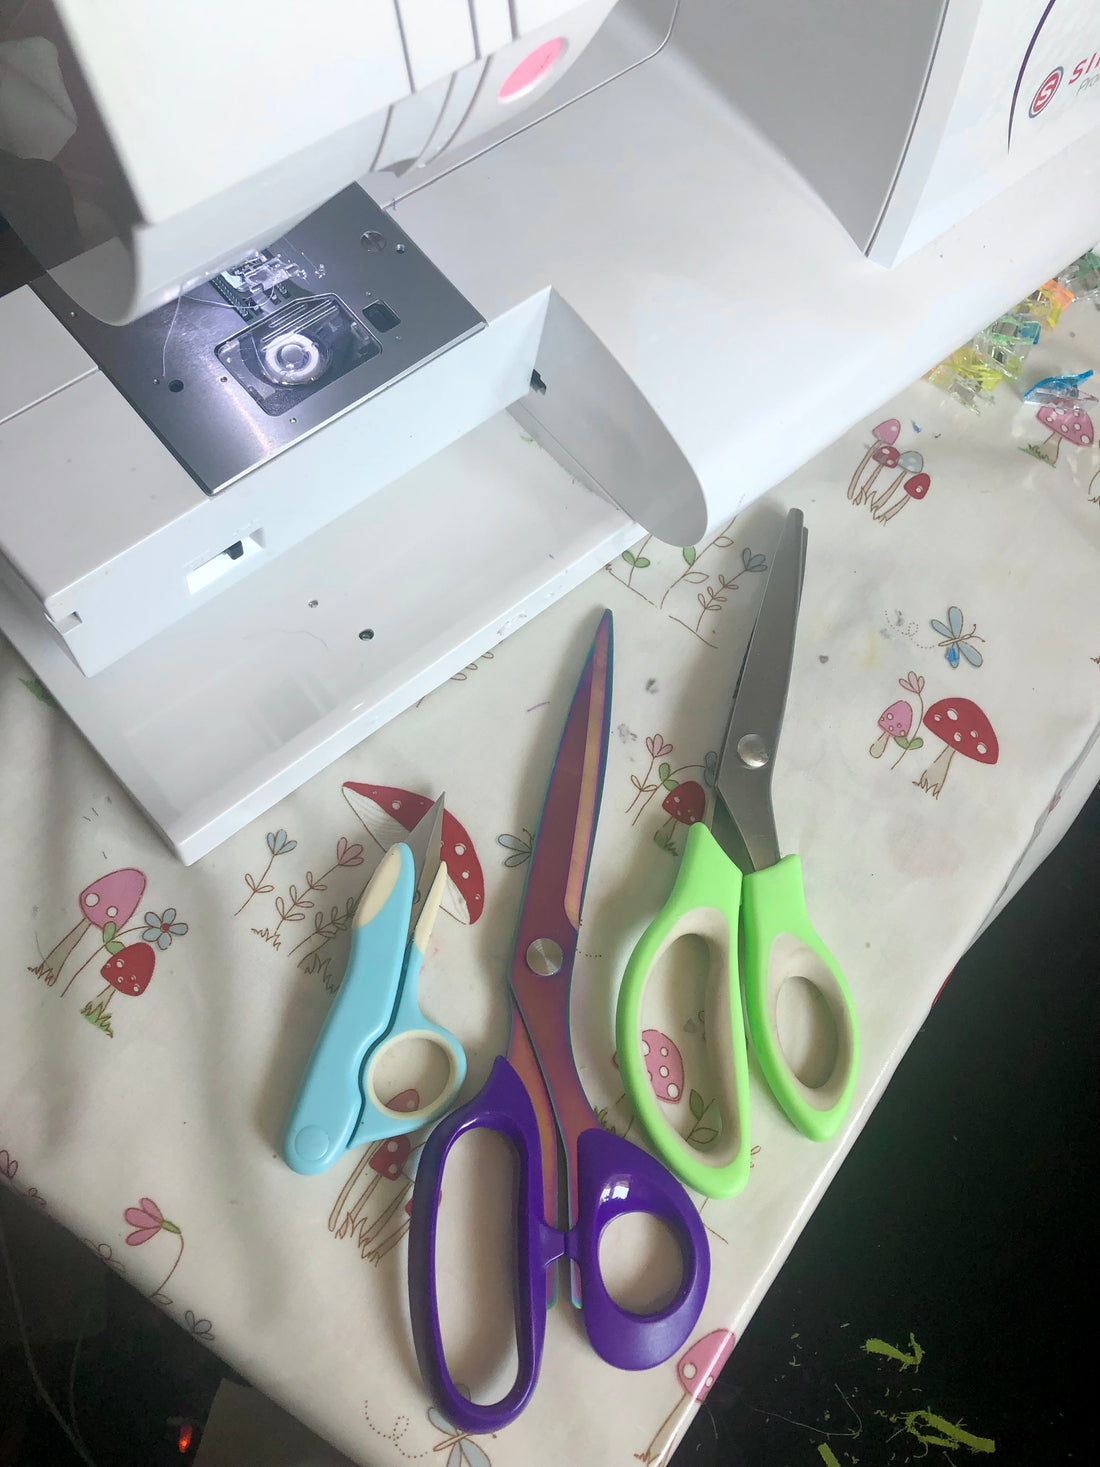
2. Cutting tools

This may be technically 4 essentials but who’s counting? (Lol me)
You’ll be cutting fabric so you need a good, sharp pair of fabric scissors. I use these purple handled ones which I picked up from Amazon, you can find different length blades, left handed scissors or easy grip ones if you need them.
The green handled ones are pinking shears, which are great to use on fabrics like satins which may fray easily. They cut in a zig zag line as opposed to a straight line and help to reduce bulk in projects which you may need to flip out (I use them a lot when making bucket hats).
When you’re shipping the tails of thread from projects, you’ll find it useful to have some smaller scissors, thread cutters or embroidery scissors to make sure you can get as close as possible for a more polished look on your projects. I got these in a set from hobby craft (which they don’t have on their website), which came with a small pair of scissors and a larger pair which I use to cut out my paper patterns (pro tip: use different scissors for fabric and cutting your paper patterns out, you don’t want to ruin your fabric scissors!)
Here’s a similar set of cutting tools from Hot Pink Haberdashery.
Arguably, you may find a rotary cutter useful. Personally, I don’t like working with one, I just don’t find it as easy to cut accurately, but some people find them better than scissors.
3. Clips or pins

There’s a few options available, and you can have different ones for different uses, or just use one type. Personally I use three types.
My most used are probably wonder clips, you can get the, pretty much anywhere and they are cheap but they’re also made of plastic. I can be a bit clumsy and end up stabbing myself too much with regular pins, which is why I choose clips, but they’re not suitable for everything as they’re bulky. They also leave no pin marks.
When I need to pin something more delicately, I just use standard pins like these ones.
My favourite though as these wonder pins by Clover MFG - clips/pins, because sometimes my hands don’t work right and you can pin 3m layers of fabric using one one hand!
4. Tape measure

You will 100% need a tailors tape/sewing tape measure! and if you’re anything like me, you’ll need 5 or 6 because I can never find mine.
Whether you’re measuring out small pieces for scrunchies or taking body measurements of yourself or others, this will be your best friend. You can pick one up from any craft shop, haberdashery or online.
5. Markers

Something really handy to have multiple of again are marking tools. You have a few different options.
The first one (which I use mostly) are fabric marking pens - they usually come as a set of different colours, including a white one to help with darker fabrics. They either usually disappear when you apply heat (so if you’re iron pressing your project) or water (so they come out in the wash).
Your other option is tailor’s chalk, this can easily be rubbed off and comes out in the wash too.
You can of course just use a pencil, or lightweight pen if you can’t find marking pens or tailors chalk, but you may only want to do this if you won’t be able to see it.
and here’s a bonus one for you!
6. Patience

One thing I definitely have to practice daily is patience. You won’t be able to sew a ball gown on your first go, but as you practice more, you’ll learn new skills and get better at sewing. I have been known to abandon projects at the first sign of trouble, or to throw a bobbin across the room when something isn’t going right. When this happens, I get up, put the kettle on, make a coconut milk latte, and take a breather.
I really hope you found this useful, let me know in the comments if you did, or if there’s anything you think I’ve missed.
Peace, love and a healthy gut,
Tiffany xo